
Phase 1 of my back garden observatory is complete! This provides a solid concrete pier / post to provide a permanent mount for the telescope, always perfectly levelled and aligned. Having this observatory will eliminate a good hour of setup time for astrophotography which demands quite a precise setup. The solidity should also make for more reliable long exposures (which can be 30 mins, perhaps more). Phase 2 will be a decking surround with a shed that will be modified to push back onto the patio behind the telescope for observing sessions. This will allow the telescope itself to remain permanently in place outdoors. The concrete pier was a back breaking weekend’s work which I completed 2 weeks ago. What follows is a brief photo diary of the work, as it was scouring through posts and photos like these that gave me the ideas, hints and tips that I needed.
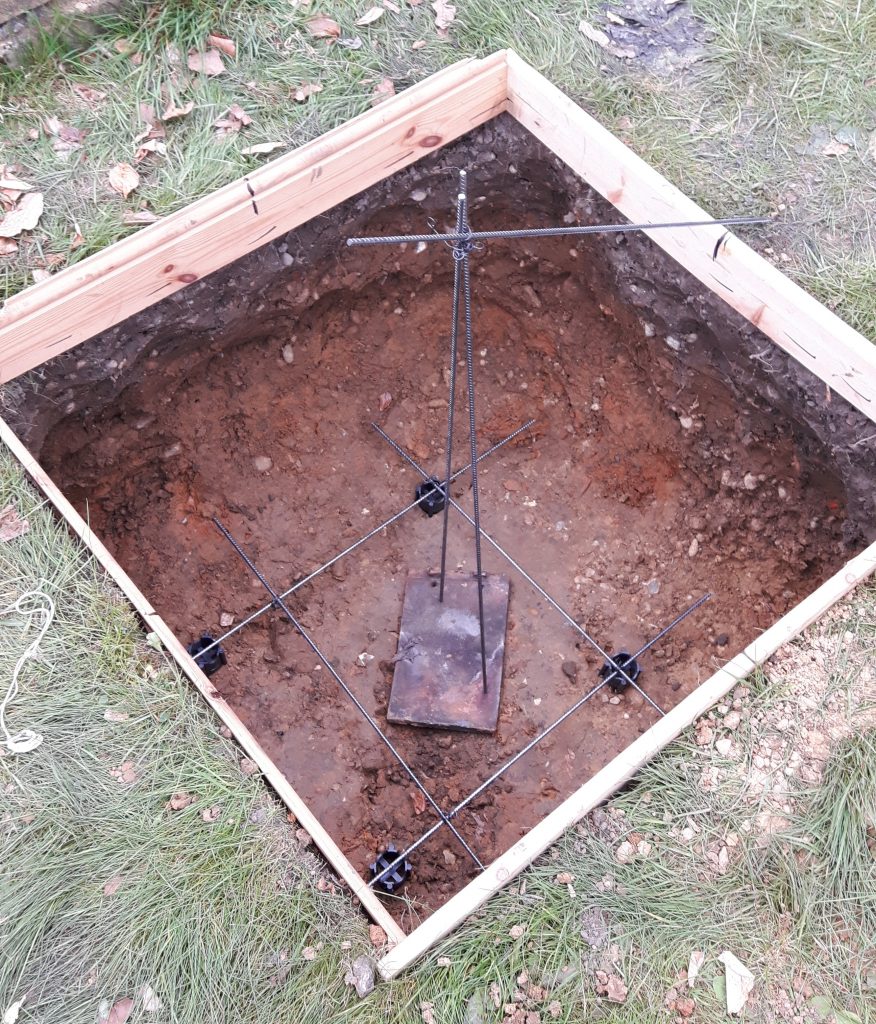
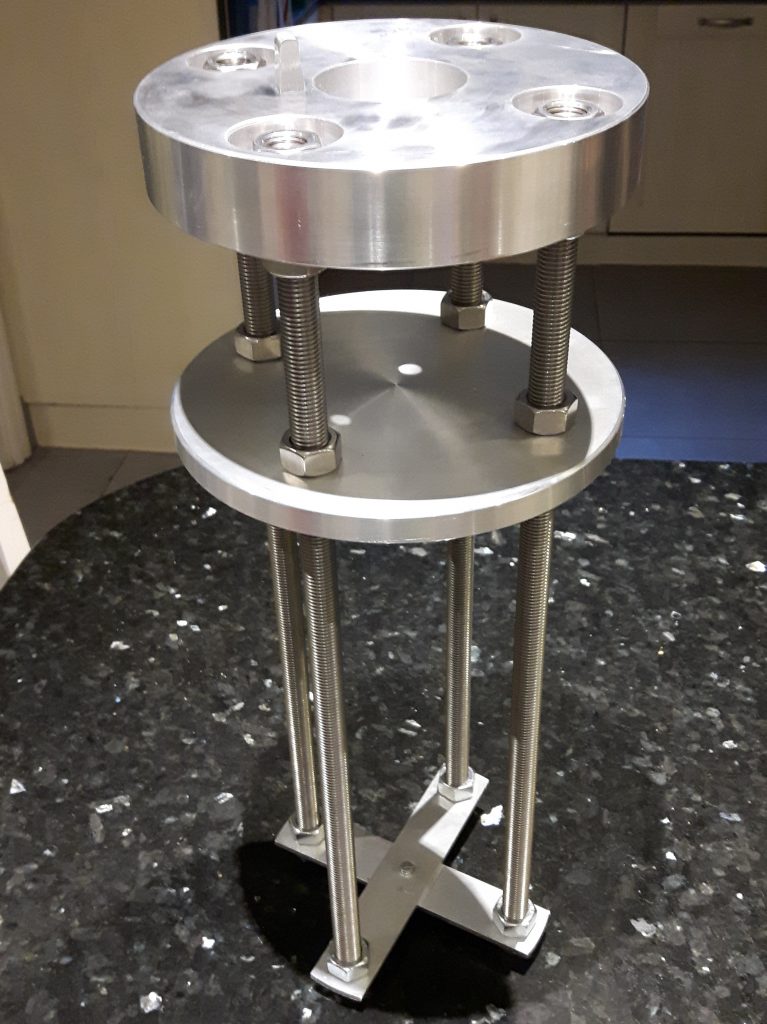
The basic design for the observatory is a 3 foot square by 2 foot deep concrete foundation, with concrete cylindrical column cast on top, 24.5cm in diameter and 90 high. Cast into the top third of the column are long metal bolts and a metal adapter that will hold the EQ5 mount of my telescope (the part that holds the telescope tube itself) .
Digging the hole was perhaps the easiest part; a few hours work. I dug the bottom of the hole out sideways a little, hopefully making the foundation more secure. The bottom is well down into solid clay. At the bottom of the hole I added some 6mm steel reinforcement bar (although I’m not sure if this is substantial enough). The bar is held on supports to prevent any contact with soil or moisture. I added another bar grid part way through pouring. The vertical bars serve to provide reinforcement to the bottom part of the column. The top part will be reinforced by the long bolts of the adapter plate that will eventually hold the telescope mount and telescope.
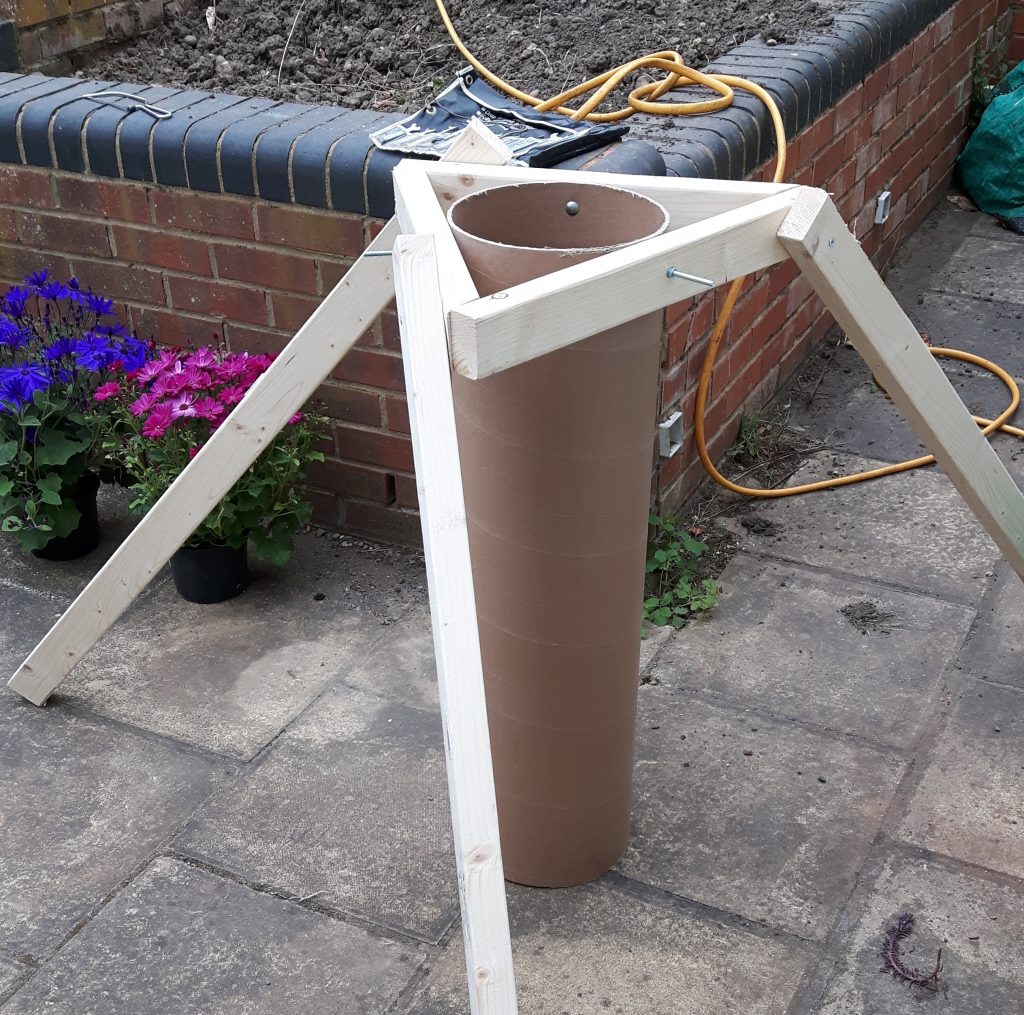
I also made the ‘form’ and support work for the column. This is basically a cardboard tube, but purpose made and strong enough to withstand containing wet heavy concrete. The wooden support work is temporary, just enough to hold the tube in place and vertical whilst the concrete sets. It could have done with additional support at the bottom, but I couldn’t think how to do that ahead of time and guarantee a vertical position once in the final location over the foundation.
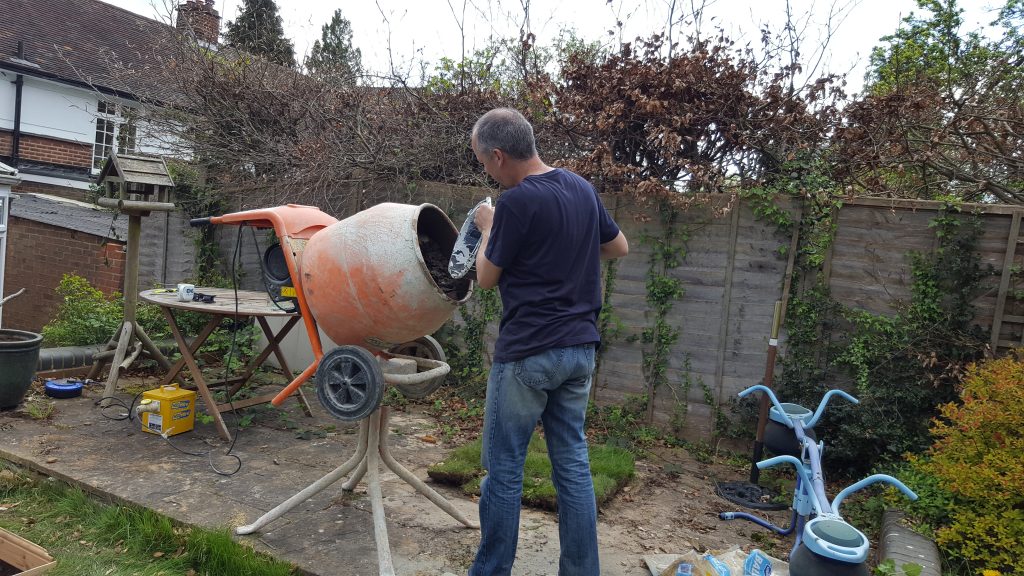
Day 2 was mixing and pouring concrete. And LOTS of it. 59 bags of mix all in all, mixed 1 barrow at a time in a hired concrete mixer. The mix was 4 ballast (sand and gravel) to 1 cement, although for a portion I did make the mistake of adding additional sand. I also underestimated quantities resulting in a frantic trip to Wickes partway through.
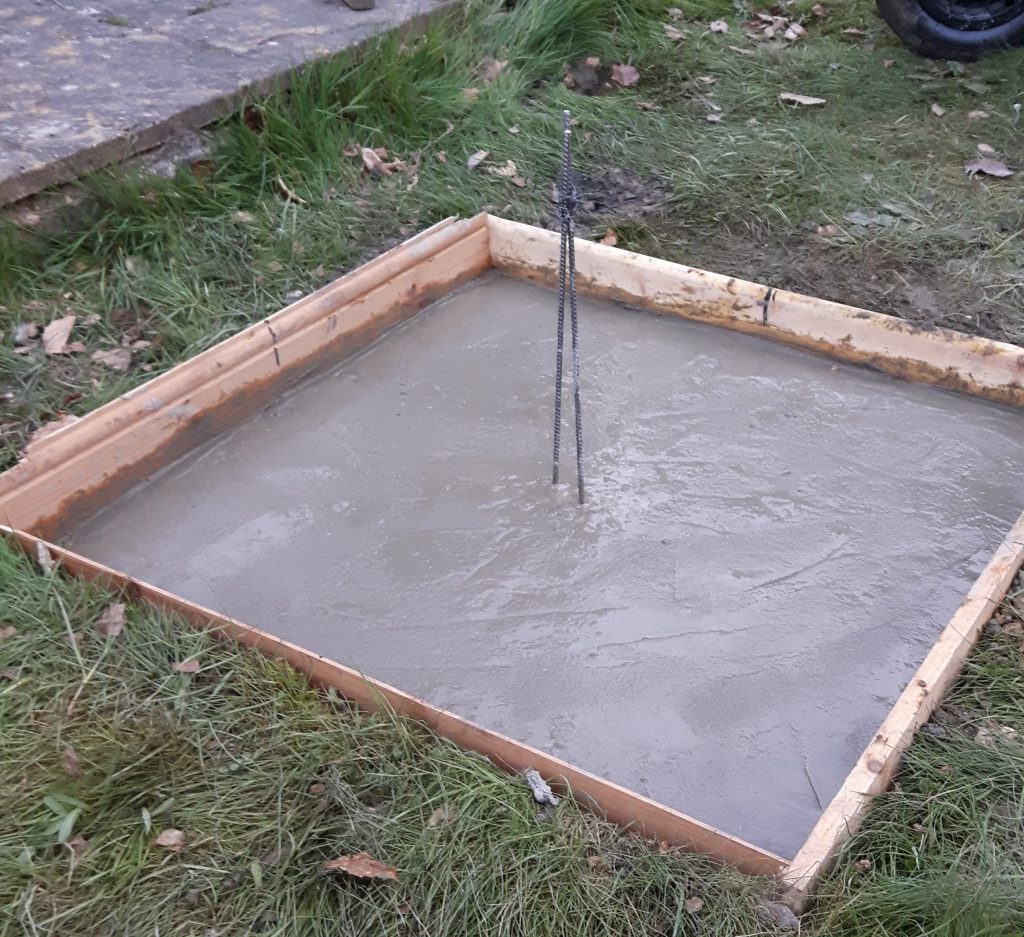
With the foundation poured, I set the tubular form into place, and let the foundation go off for about an hour; enough for it to be firm enough to take the weight of the concrete but wet enough that the column and foundation would set as one. This resulted in having to pour the column after dark. To obtain and keep a vertical position I pushed the tube just slightly into the foundation and then moved the legs around until the tube was vertical.

The column was poured carefully with regular tamping down. I tried to use a reasonably stiff mix, but wet enough to ensure the tube was filled out to the sides and around/between the reinforcement bars. At the appropriate point the metal adapter was cast in. This meant taking off the metal plates, although these were added back before the concrete set in order to make sure the long vertical bolts were all aligned correctly. I set the lower plate into the top surface of the concrete, using a sprit level for levelling and a compass for alignment to north. However, the whole adapter must have slumped in the setting concrete at some point because the lower plate has not quite set level. It would need some clever design to prevent that, which I didn’t think of! Plus it was dark; I might just have not levelled correctly. Fortunately the upper plate can be adjusted just enough to get it back level again.
After two days I removed the wooden supports and peeled off the cardboard. This is the finished result! The spiral mark is the imprint of the spiral wound cardboard tube. The concrete mix must have been a bit wet, as in the top third some channels of sand can be seen on the outside surface, where water has come out, met the cardboard and then risen to the top (I assume). This I think is only superficial. The column came out very close to vertical and I’ve been able to adjust the top plate to get a perfect level surface. The stud must point north; it’s only about 1 degree out. Final precise alignment will be done when the telescope mount is added. This will sit on the top plate and be bolted through from underneath. However, I’m currently stripping that down, cleaning and regreasing all the gears, before bolting it on, so that will have to wait a bit…
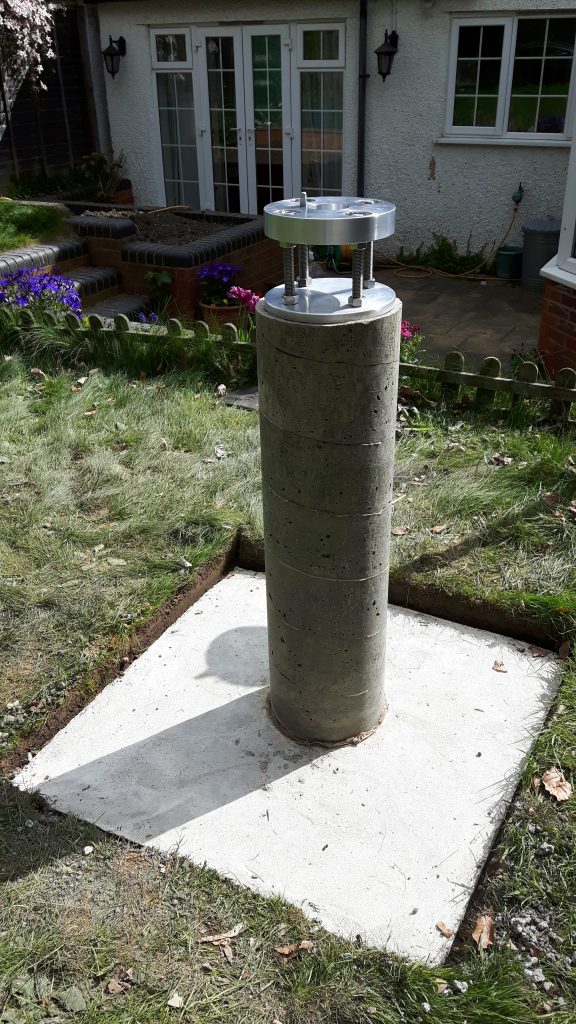
Looks fantastic! And it looks very professional.